
My Workflow
Each photographer has a different workflow., individualized to meet their needs depending on how they work. Generally, I import, sort, and edit images when I know I have a few hours to dedicate to the task. Each photographer edits photos differently so their workflow will depend a lot on their editing process and software being used, the time they have (i.e do they import, review, and edit in segmented separate time periods or all in the same session). I present my workflow to give you some options, borrow, amend or take the ones that work for you.
 The Lightroom Import Interface
To begin I import my images to Lightroom Classic. I shot always in high-speed continuous shooting, as you simply never know when something unexpected will happen such as another bird diving at the one you are photographing, or your subject making a sudden movement, whatever it might be you run the risk of missing amazing photos opportunities if you are using the single shooting mode for wildlife photography. This means I will have multiples of the exact same image if the subject is not moving when I import. I only select one of each pose at import, and I do not import any out-of-focus images or missed the action photo, such as those when you are set to take a shot, for example of a bird and it suddenly takes flight and all you have in your frame is an empty perch or half a bird. I import the images into a review folder I have set up in Lightroom that may have a variety of images over numerous days until I have time to review them. I do not put them into my organized folders which I explain later until I have had the opportunity to review them. During import, I give the images basic keywords during the bulk upload, like the species and location, but more detail I add later and I look at each image full screen I do not decide the quality of an image based on its thumbnail.
 Selecting Images to Import
Once imported I try to look through every image again full screen if I have the time but sometimes I have to save this task to another day and images sit in my review folder until I have time. When reviewing I make a quick decision about whether an image is worth another look, spending no more than one or two seconds per image. If they are I give them one star. When I have gone through all the images once I go through the one-star images and review them again. I used to review the images and edit them as I went along, so if I came to an image I thought was great and I would just start editing while not having looked at the rest of the photos in that series. Usually, I would find 4 or 5 images later, another image was just slightly better. I do not need numerous images of the same photo just with subtle differences edited nor do I have the time, which is why I changed to this method. On the second pass, I label any image I think is worth my time editing with a green label. At this point, I have seen all the images have an idea on the top ones and I decide on a handful of images, generally the best or more interesting images in the series to edit in this workflow session if I have the time. It takes me about 10 minutes to edit an image so generally, I need another hour.
 Selecting Images to Edit
To edit I begin by checking the ISO and for any image with greater than 1000 ISO I run through Topaz DeNoise. Generally, I use the standard setting except for low light, I ensure the portion of the image I am reviewing during the denoise phase includes some of the background and the eye of the animal. I normally stick with the denoise value suggested by the software's AI but increase the sharpness. Some people choose to denoise as the last step, I prefer it as the first step because some images if they have very high noise are hard to maintain sharpness and I do not want to spend the time editing an image to find out, in the end, the denoising required diminishes the sharpening too much which is especially a risk with high ISO photos taken in low light like many of my owl photos.
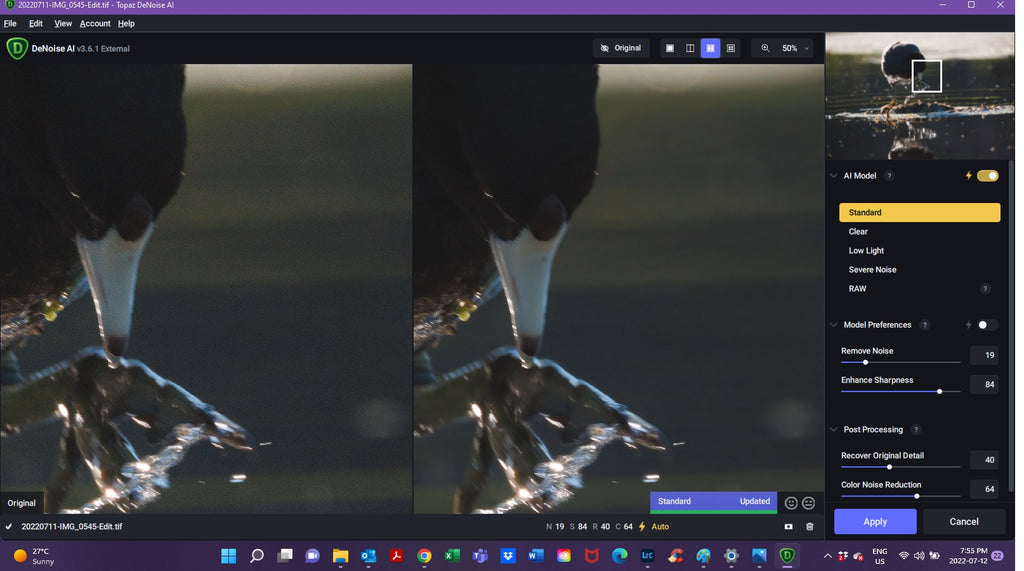 Topaz DeNoise
Once denoised I make global adjustments to the image in Lightroom in most instances this includes decreasing highlights, there may be some color corrections and I may specifically add texture, lift shadows or increase vibrance in defined areas by using a mask.
 Masking in Lightroom
At this point, I also crop the image. Some people do cropping as the very last step, so they can go back and change the crop later without having to reedit, however I use Nik Color Efex and I love the darken/lighten tool for adding a subtle vignette which could look unbalanced if cropped after the effect has been added.
 Image After Cropping
As eluded to my next step is to bring the image into Nik Color Efex. Here I do very targeted adjustments to add tension in my image such as tonal adjustments, warmth and as stated vignetting. I bring the image back into Lightroom and might make the odd subtle global adjustment if needed such as a slight increase in exposure, or bump in vibrance.
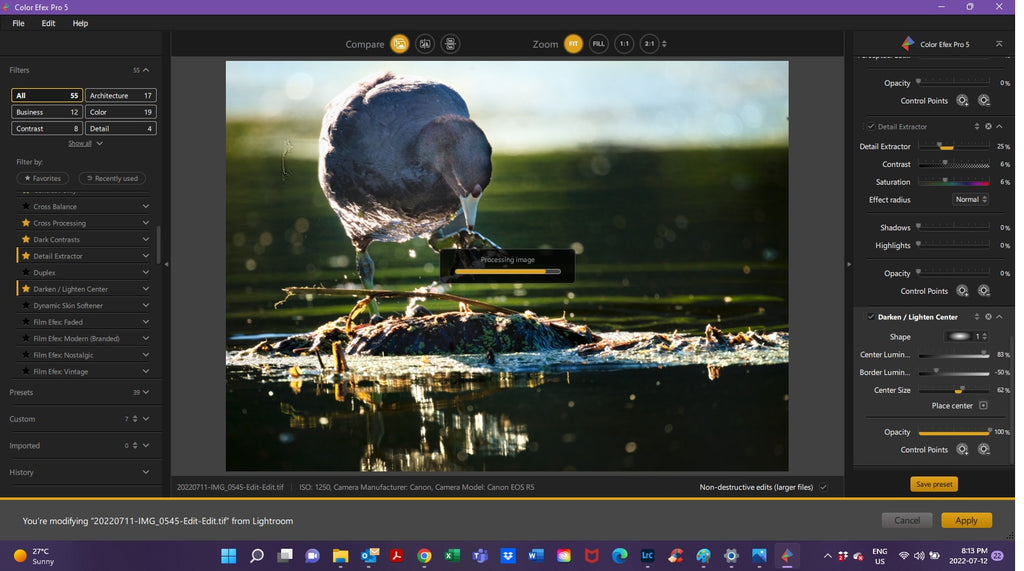 Editing in Nik Color Efex
Once edited I decide what I am doing with the image. Is it print-worthy and going to my custom order print site, is it a good image for licensing, and should I put it on my licensing site? For these sites, I have plugins in Lightroom that allow me to simply drag and drop the image into a folder and publish it directly from Lightroom onto the sites. If I am publishing them I add a title in the metadata field and add more specific keywords.
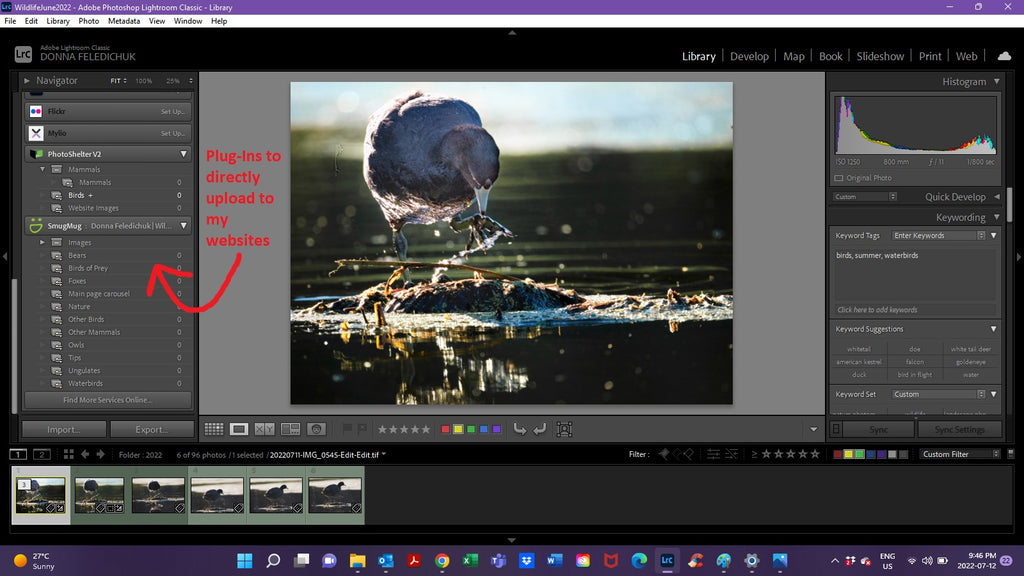 Many Photography Websites Have Plugins for Lightroom Making Uploading Easy
If I decide I am going to share it on Instagram, I load to Instagram directly from my phone so I drag and drop the image to a Smart Collection in Lightroom that syncs to my mobile Lightroom App. This makes the image accessible on my phone for posting. If I am going to post to my Facebook page I export the image using the export feature and select the long side as 2000px with 72dpi as I only post low-resolution images on Facebook. This is to discourage people from illegally using my image and violating my copyright although programs like GigaPixel are making it easier for people to use low-resolution photos and turn them into print-quality images. I also keep a folder of potential images for my annual calendar on my computer and if I think the image is a contender I export it as well with no compression and 300dpi to my calendar folder so it is print ready.
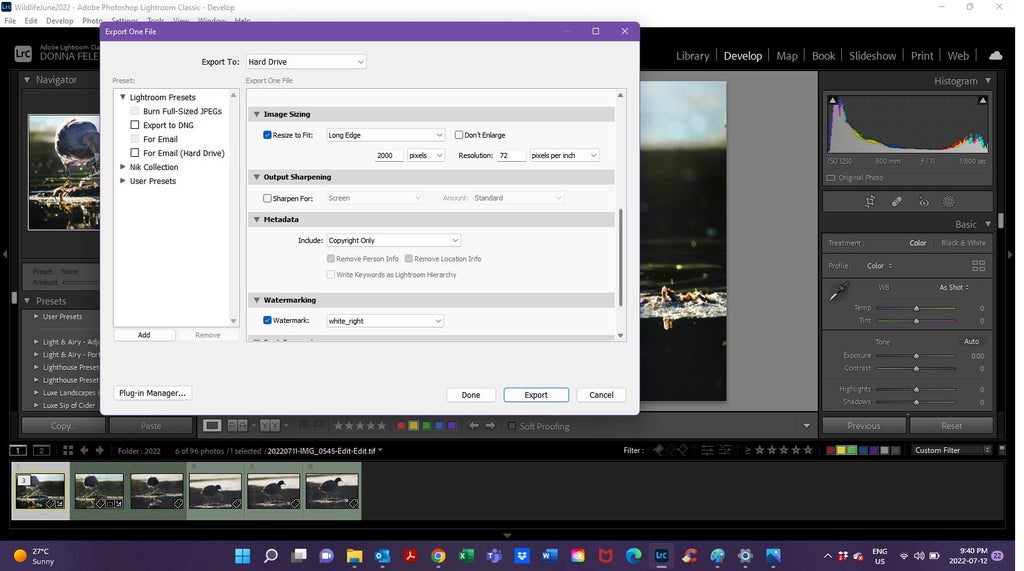 Exporting Images from Lightroom Classic and Changing Color Label
Last I determine if the photo is a good entry for photo contests. If it is I change the color label to purple so it is easy to find. I keep a folder for each of the different contests I plan to enter but at this time I do not export to these folders. If you are familiar with entering contests you will know that each contest seems to have a different file requirement for submission. For this reason, I wait until it is close to the contest deadline, filter all my purple flagged images and decide which to submit and set the export variables for that contest. If I do not think the photo is contest worthy I change the label color to yellow meaning its been edited but I am not doing anything further with the image.
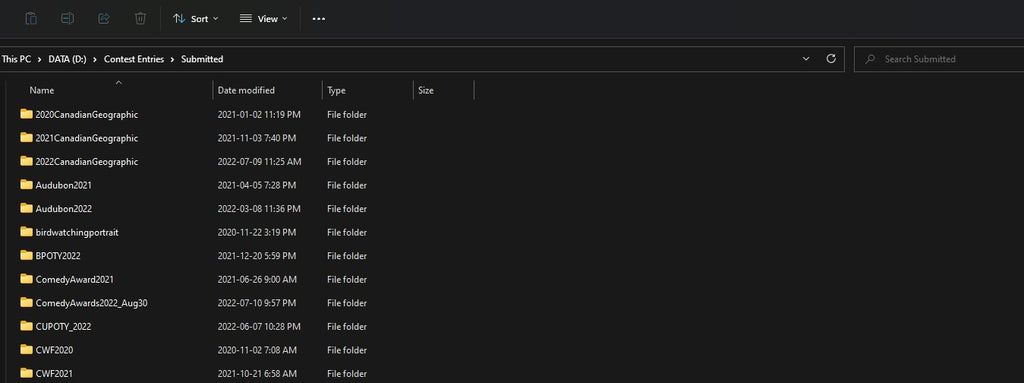 My Competition Folders
Once I have edited the four or five images I intend to do immediately for the series in that session, I move the images to species-specific folders I have set up in Lightroom. This is how I organize my images, not by date or location but by species. For me, it is easier as I am out most days in the area I live. If you are someone that takes a few big photography trips a year but does very little between those trips then a location or date organization might be better.
 Lightroom Folder Organization
Later when I have time, which generally seems to be during the winter months, I will edit the other photos. Rarely do they all get edited, but when I came back to a folder for example my collection of black bear images, I filter all the green-labeled images in the folder, scroll through them and decide which ones I want to do next. I find it easier to edit a group of species images at the same time as most of the adjustments you are making will be the same between images and you can cut and paste adjustments from one image to the next in Lightroom and make a custom preset for your adjustment in Nik Color Efex which can take my image editing time from 10 minutes to 5 or 6 minutes per image. If I am editing 20 or 30 images in a session this really saves a lot of time.
 Filtering by Color Labels to Quickly Access Images Still to be Edited
That is my workflow, I hope some of you find it helpful, If you have any questions feel free to drop me an email or message me on Facebook or Instagram.