
Editing Low-Light Wildlife Images: Tips for Stunning Results
Donna Feledichuk
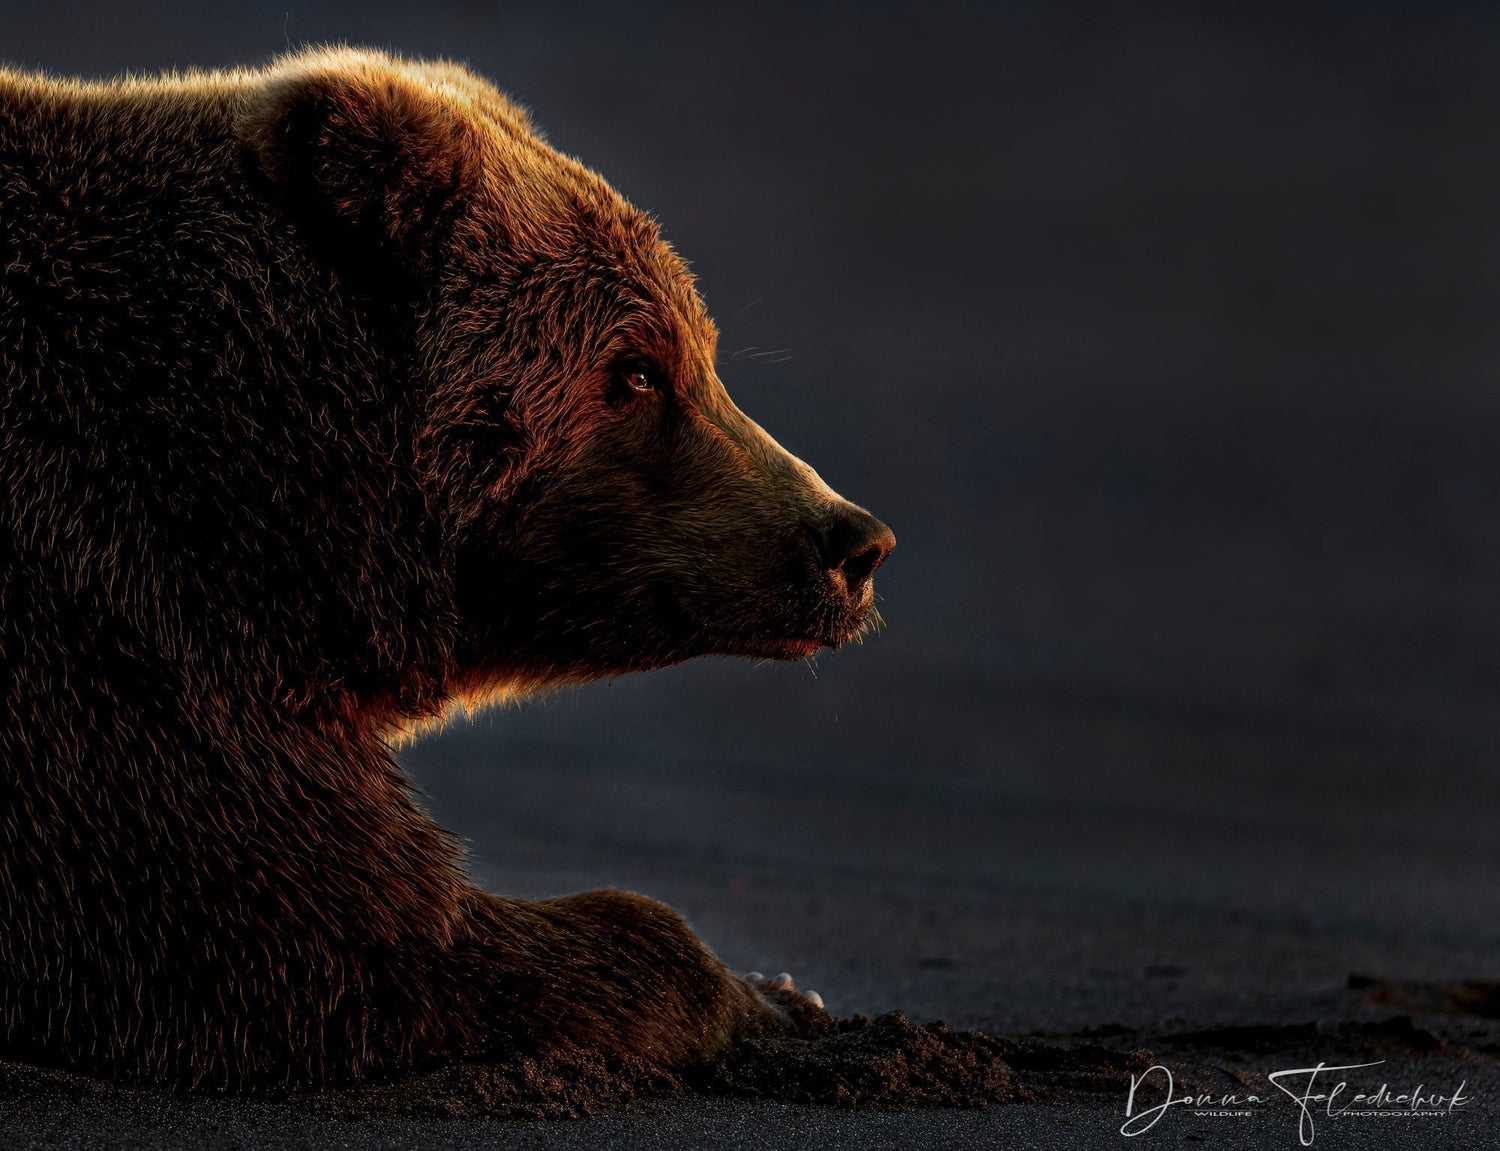
A backlight coastal brown bear with rim light
The question I had from Stan this past week, via my Instagram feed was how do I edit low-light images. This is a hard question as there is no one right answer. First, I will start by saying you need to make some quick decisions in the field in regards to the type of image you will take. The light will ultimately dictate your choice. If there is so little detail to be obtained from the subject, then a silhouette would be the appropriate choice, provided you are capturing the sunset colors in the background. When taking a silhouette photo, you need to decide if you want a silhouette in which the subject is black or one with a little detail. Or perhaps you can see the rim light capturing your subject, and want to capture that special light outlining your subject.
As there are too many options to cover in one post, I decided to focus on the rim light-capturing photos. I will focus on editing these types of images and will leave the camera settings in low-light situations for another day.
I begin my process flow by bringing all my images as RAW files into Lightroom. I have a method for determining which images to select for editing which I will explain in a different tutorial.

Original unedited, and uncropped image
My first step is to crop out any distractions and get close to my final crop. I do not crop to where I think I want it on the final image, but leave some room, should I decide to move things slightly, so I do not have to re-edit the image.
While in Lightroom, I make global adjustments to the image first. In the case of low-light images where you are bringing out the rim light, this usually means bringing up the warmth (yellow slider) and taking down the shadows, possibly the blacks, and exposure, depending on the image. Highlights are tricky, as in some images they might look better bumped up, and sometimes it blows out the rim light, and you need to bring them down. This takes experimenting with the sliders as each image will be different, but these are the global adjustments I generally make in Lightroom before moving on in my process.

After global adjustments and initial cropping in Lightroom
My next step is to run the image through Topaz Denoise which I do for almost every one of my images unless they are below ISO 400. I generally let the software's AI determine the amount of noise reduction that is necessary, but bump up the sharpness to give that crisp definition, but not so high as to introduce artifacts into the image. This program is unbelievable and is a game-changer is all I can say! Well worth the money if you have never tried it before, and they keep on improving it with each upgrade.

In the Denoise program
Next, I edit the image using Nik Color Efex. Let me say I love this program. It can do things in seconds that would take a lot of work in Photoshop or Lightroom to do. It is not necessary to have the program but it is very nice to have one and can sure decrease your editing time. My first adjustment is the tonal contrast adjustment. I set each of the sliders at around -30 and saturation at 0, using this on the background only, which helps take some structure out and minimize the background so the focus is on the subject.

Tonal Contrast adjustment in Color Efex
The next tool I use is the contrast color range tool to bring a bit more drama to the image. I start with the sliders all at zero and slightly bring up contrast and the color contrast to allow a bit of emphasis to the subject but not so much that it looks harsh.

Contrasting the color range in Color Efex
The last step I do in Color Efex is to use the darken/lighten option to draw attention to the subject. This gives a much more subtle vignette effect than what you would get in Lightroom, so I much prefer this method to darken the area around the subject and lighten the focal point in your shoot.

Darken/Lighten Center in Color Efex
Once complete I bring the image back into Lightroom and make my final touch edits. I use the brush tool to highlight the rim light and bring up the exposure in this area to enhance this effect. Some folks might choose to export the image into Photoshop and use the dodge tool to enhance the rim light, but I try as much as possible to do those types of edits in Lightroom. However, if you want a really strong emphasis on the rim light, the dodge tool will give a more pronounced effect than using the brush tool and exposure slider in Lightroom. I also use the brush tool to brighten the light being captured by the eye of the subject. In this image, I isolated the background using the select subject option and inverting the selection used the blue slider to bring out more contrast between the background and the bear (as blue is a nice contrast to yellow and the hint of blue in the backgrounds draws the attention to the golden colors in the bear). In this image, I felt there was too much redness in the bear, so I went to the HSL/Color panel and used the saturation sliders to decrease the red color channel saturation slider to remove some harshness due to this color. As a tip, in many photos with lots of black in them, the blacks can appear to have a purple tinge. In these images, I usually bring down the saturation of the purple or magenta channels, which does wonders for the image!

Final image with final crop and adjustments in Lightroom
These are the steps I take in editing blacklight images with rim light. The amount of adjustment varies in every photo, so I cannot give the specific amounts for every adjustment such as setting the exposure to -0.70 or the blacks to -0.50 but I have outlined my workflow, the software programs I use, which sliders I adjust, and which tools in these programs are important to edit these images. I hope this gives you a framework to begin if you have struggled with editing these types of images in the past.
Wishing you the best of luck in your editing, and if you have any questions or would like to see further tutorials on this topic please let me know!
